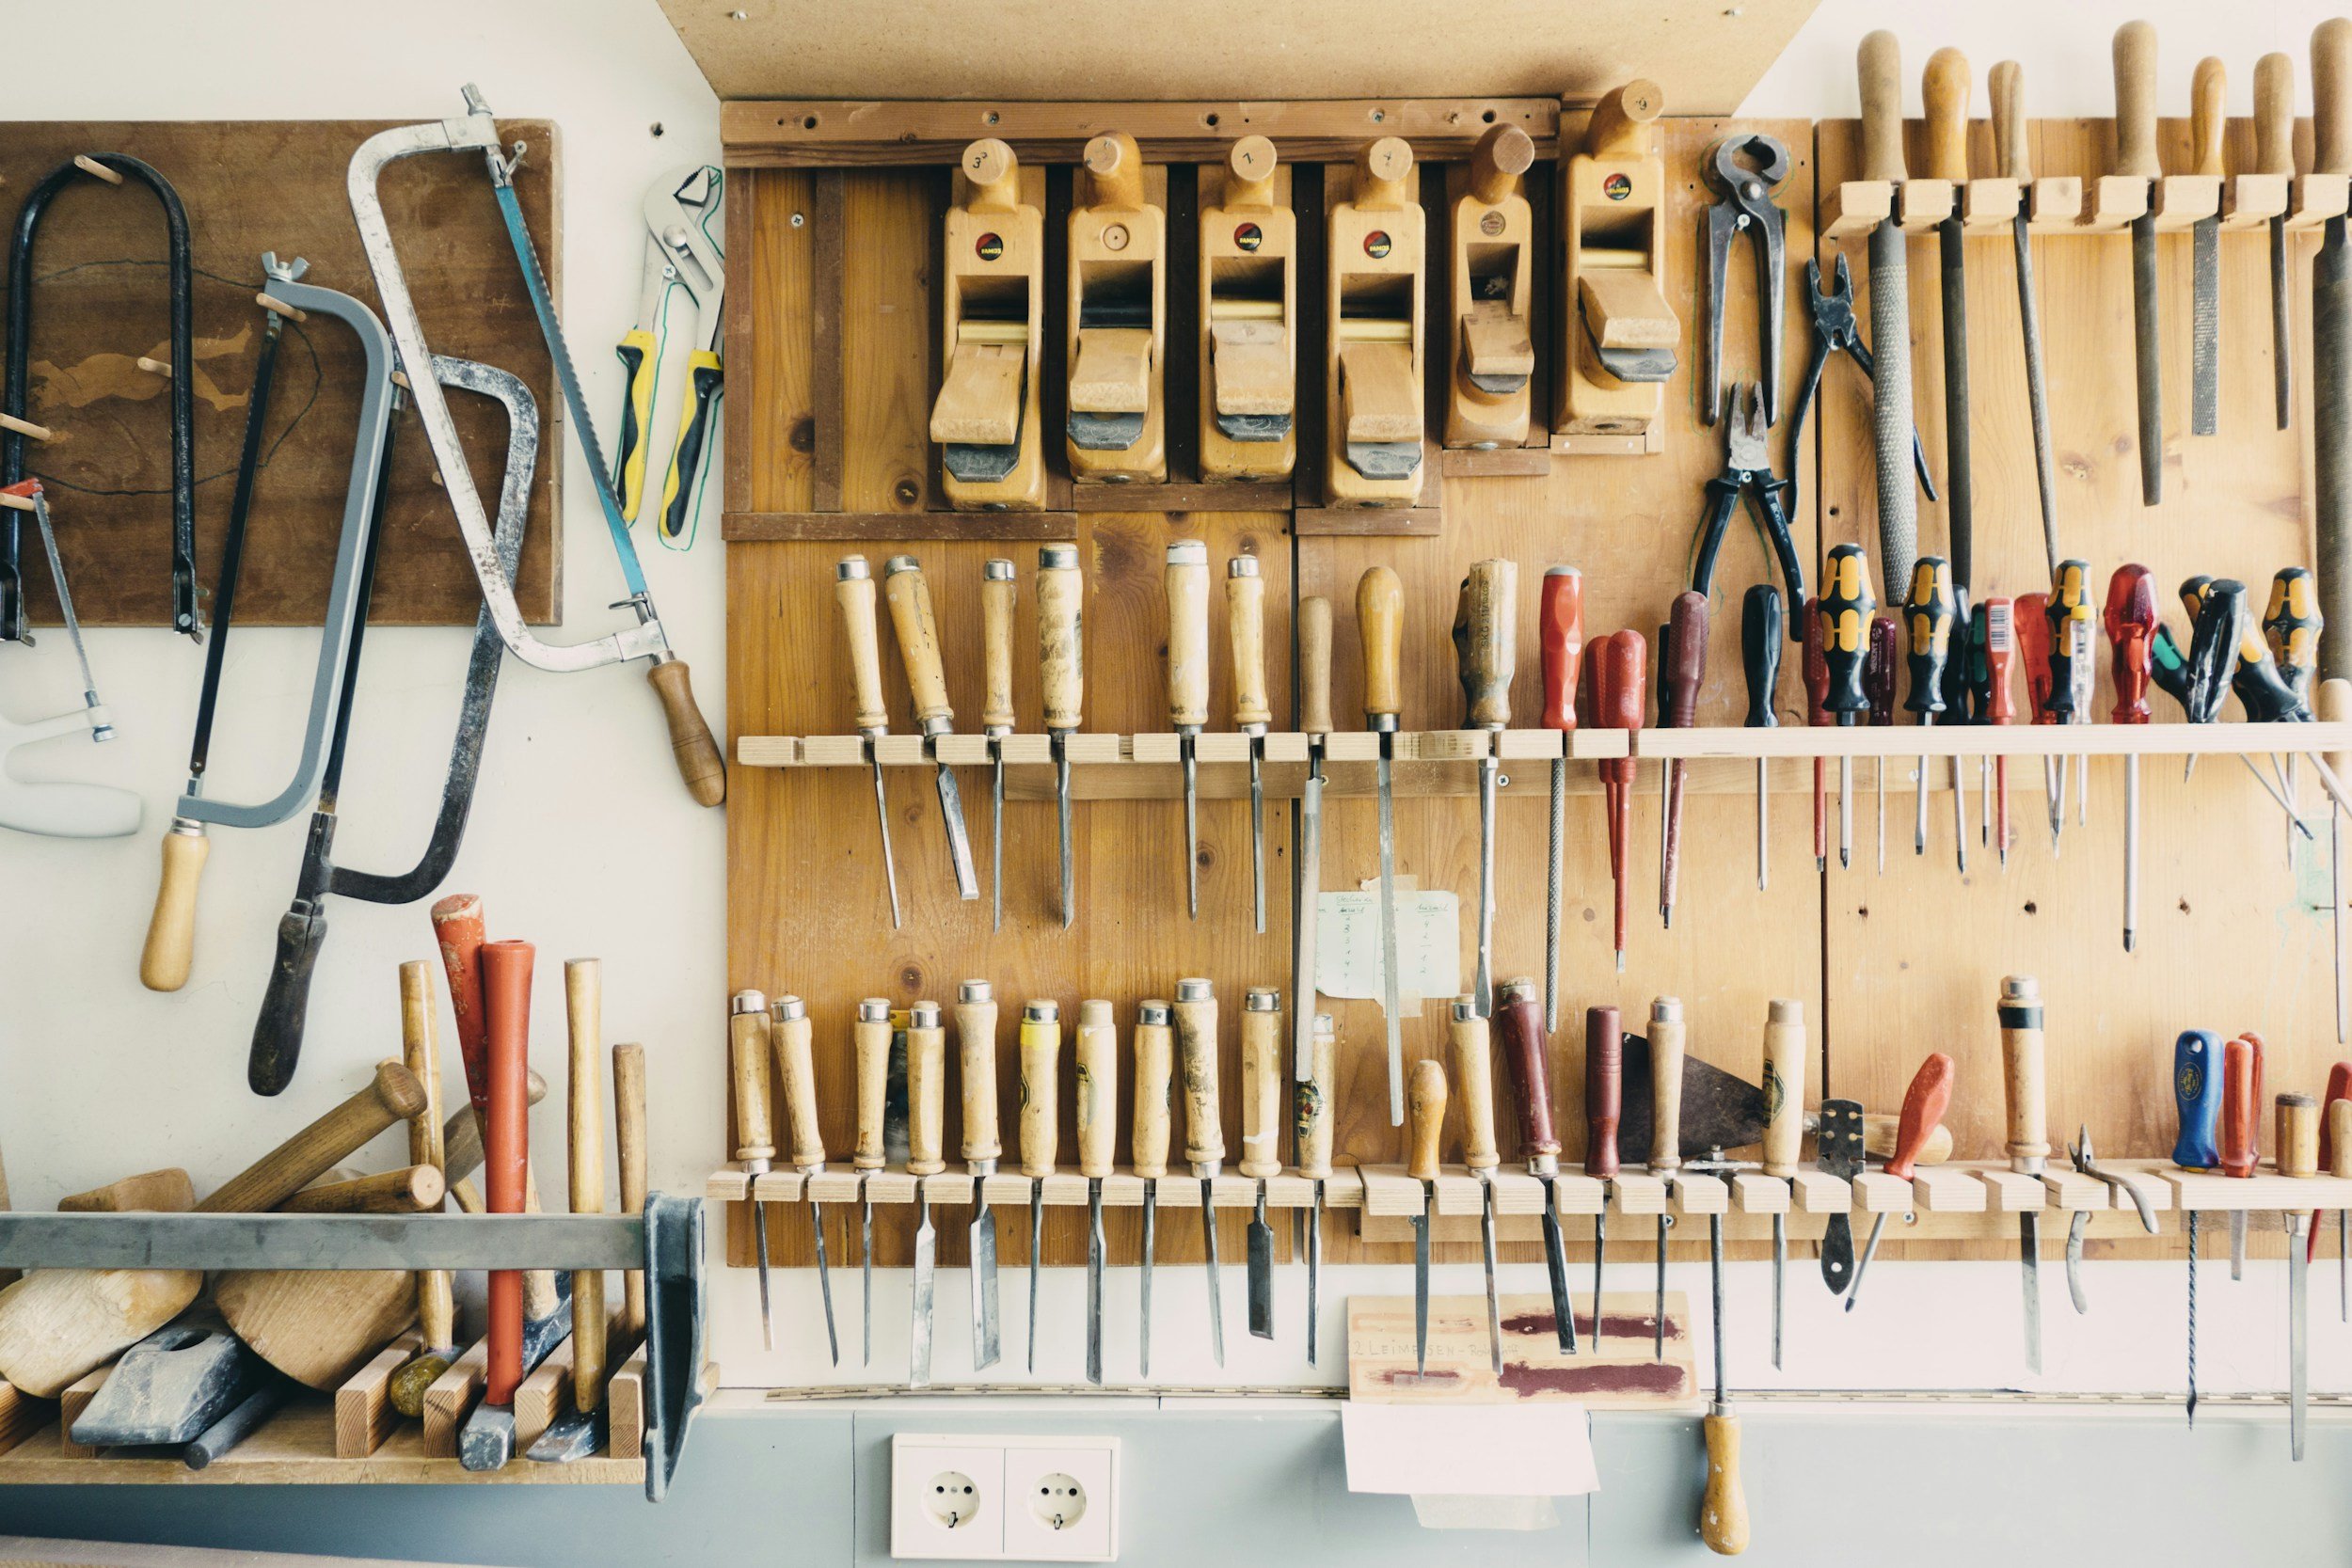
Tools & Materials
The tools & materials are the vectors between the theoretical and the physical.
It’s important to recognize that while materials and tools play a role in enhancing art, the true magic lies in the skill of the artist. Even the ‘worst’ pencil on the ‘worst’ paper can create a stunning drawing when in the hands of a talented creator. With that being said, after testing out what feels like thousands of materials and brands, below are what I have found to be best for me and my work with pastels.
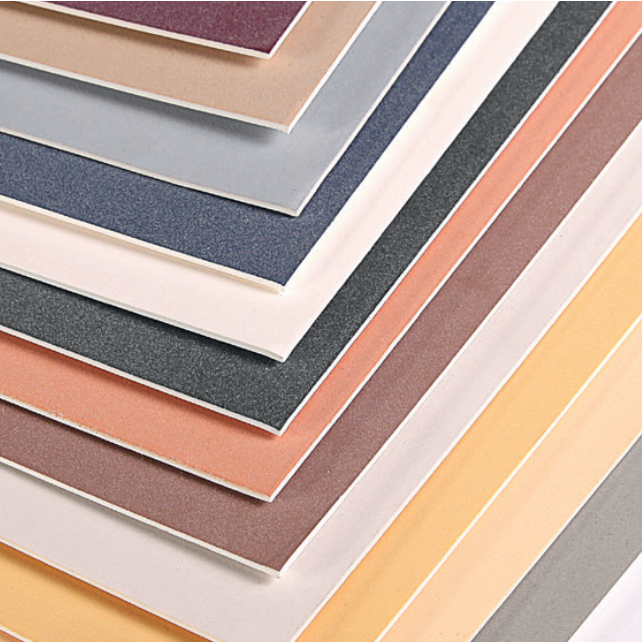
Canvas
PastelMat stands out as the finest canvas I've ever worked on. Its exceptional "layerability" and substantial tooth afford ample space for building up multiple layers while still accommodating intricate details. The Ampersand surface is, in my experience, second to none.
-
This is a specialized surface for pastel art. It offers a unique texture and quality that enhances the vibrancy and blendability of pastels. With that being said, I also use coloured pencils and Pan Pastels mixed with water on its surface and found that to also work great.
It has tooth that holds the pastel exactly as I need a canvas to. It allows for many layers that I haven’t been able to achieve with another canvas.
Here is a link to the company’s website. -
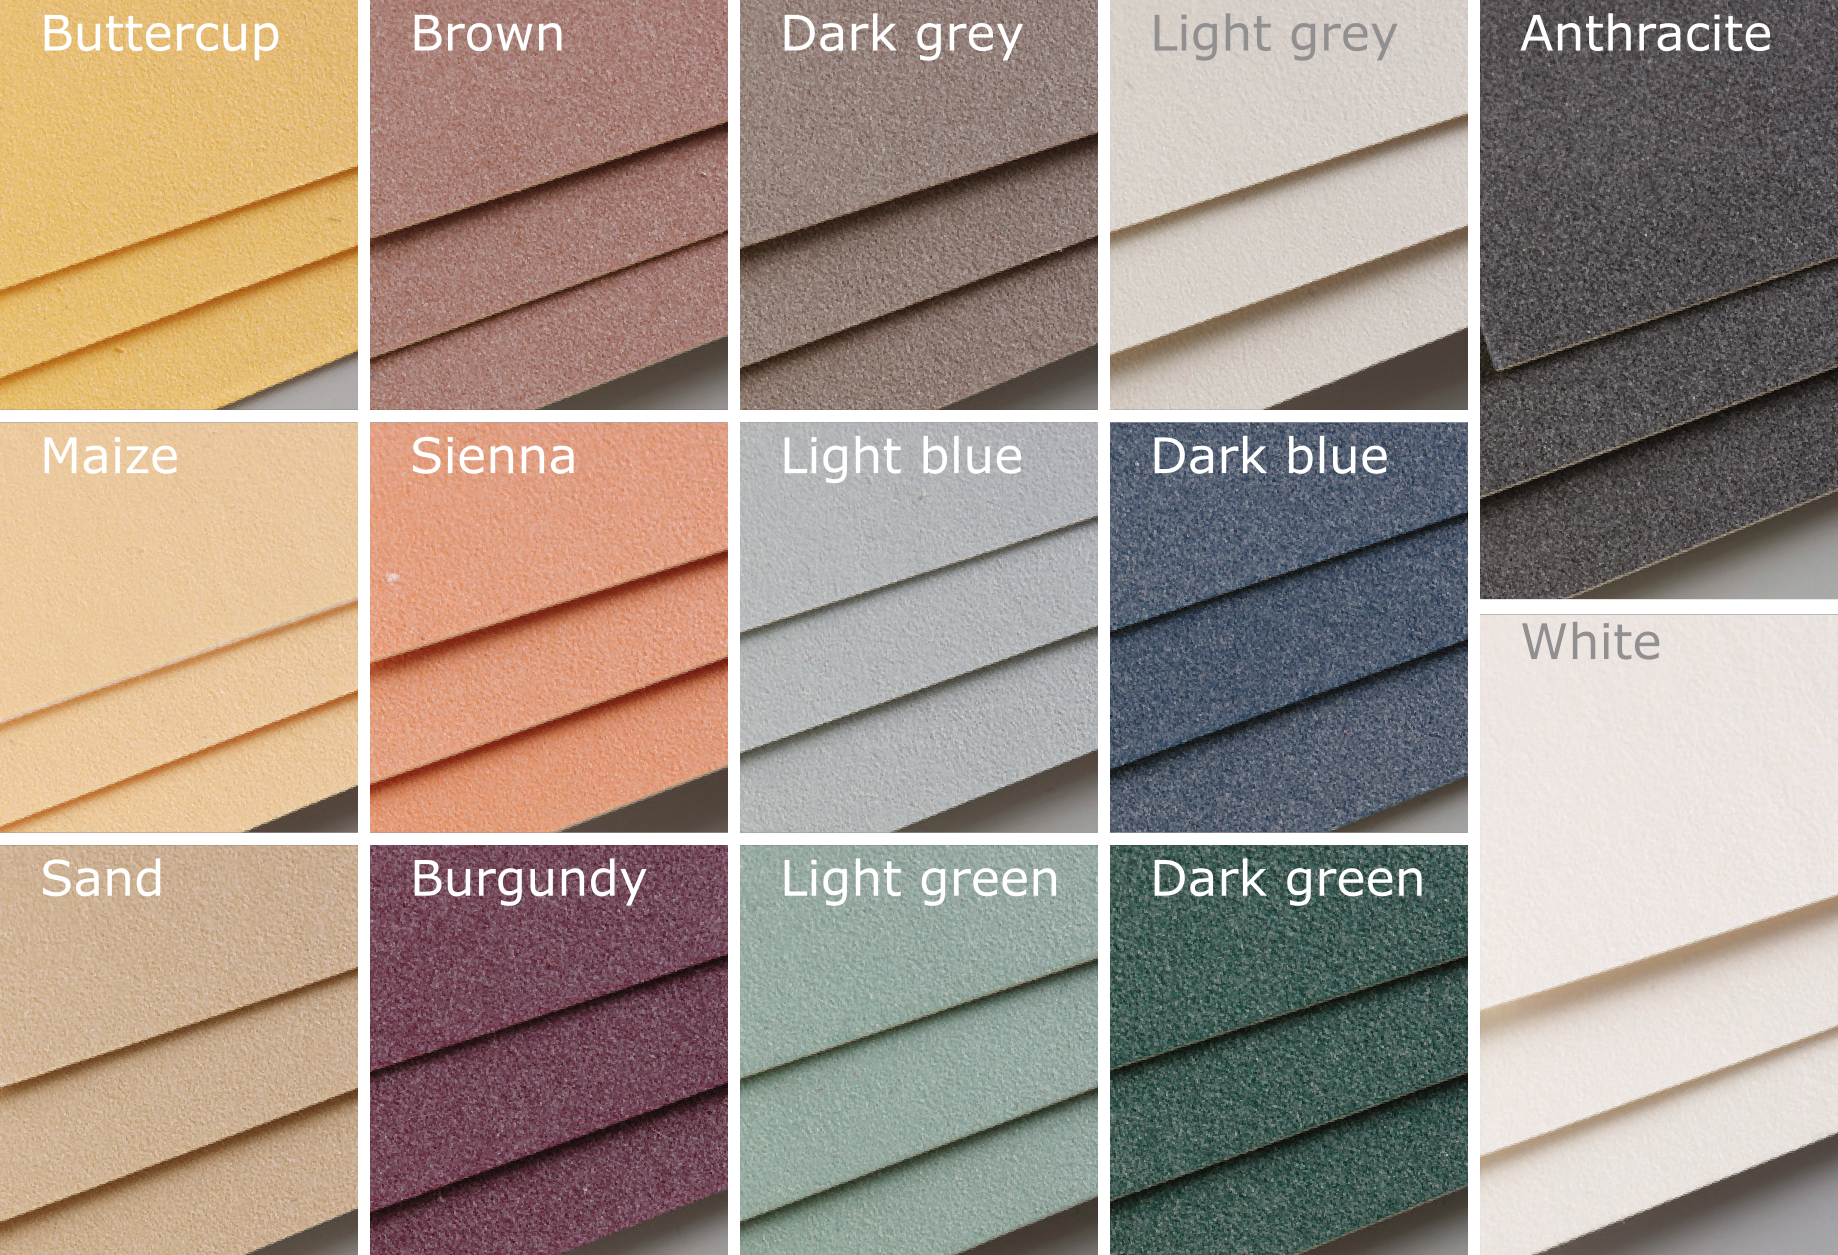
This is a type of paper specifically designed for pastel colors. It’s infused with a certain texture (called tooth) that holds pastel colours any layers effectively, allowing for rich color application and detailed artwork.
Here is a link to each colour.
Clairefontaine Pastelmat Paper has a slightly smoother texture compared to Pastelbord. -
This is a more rigid and sturdy version of the PastelMat Paper. It provides additional support for artists who prefer a solid base for their artworks. It works well for me as there’s no ‘bounce’ that soft paper can usually allow for, as it stays flush against my easel due to it’s thickness. It is more durable than the paper version, and also more expensive, and as such if you choose this surface for me to work on for you, there is a minor price increase.
Here is a link to find each colour.Pastelmat has a slightly smoother texture compared to Pastelbord.
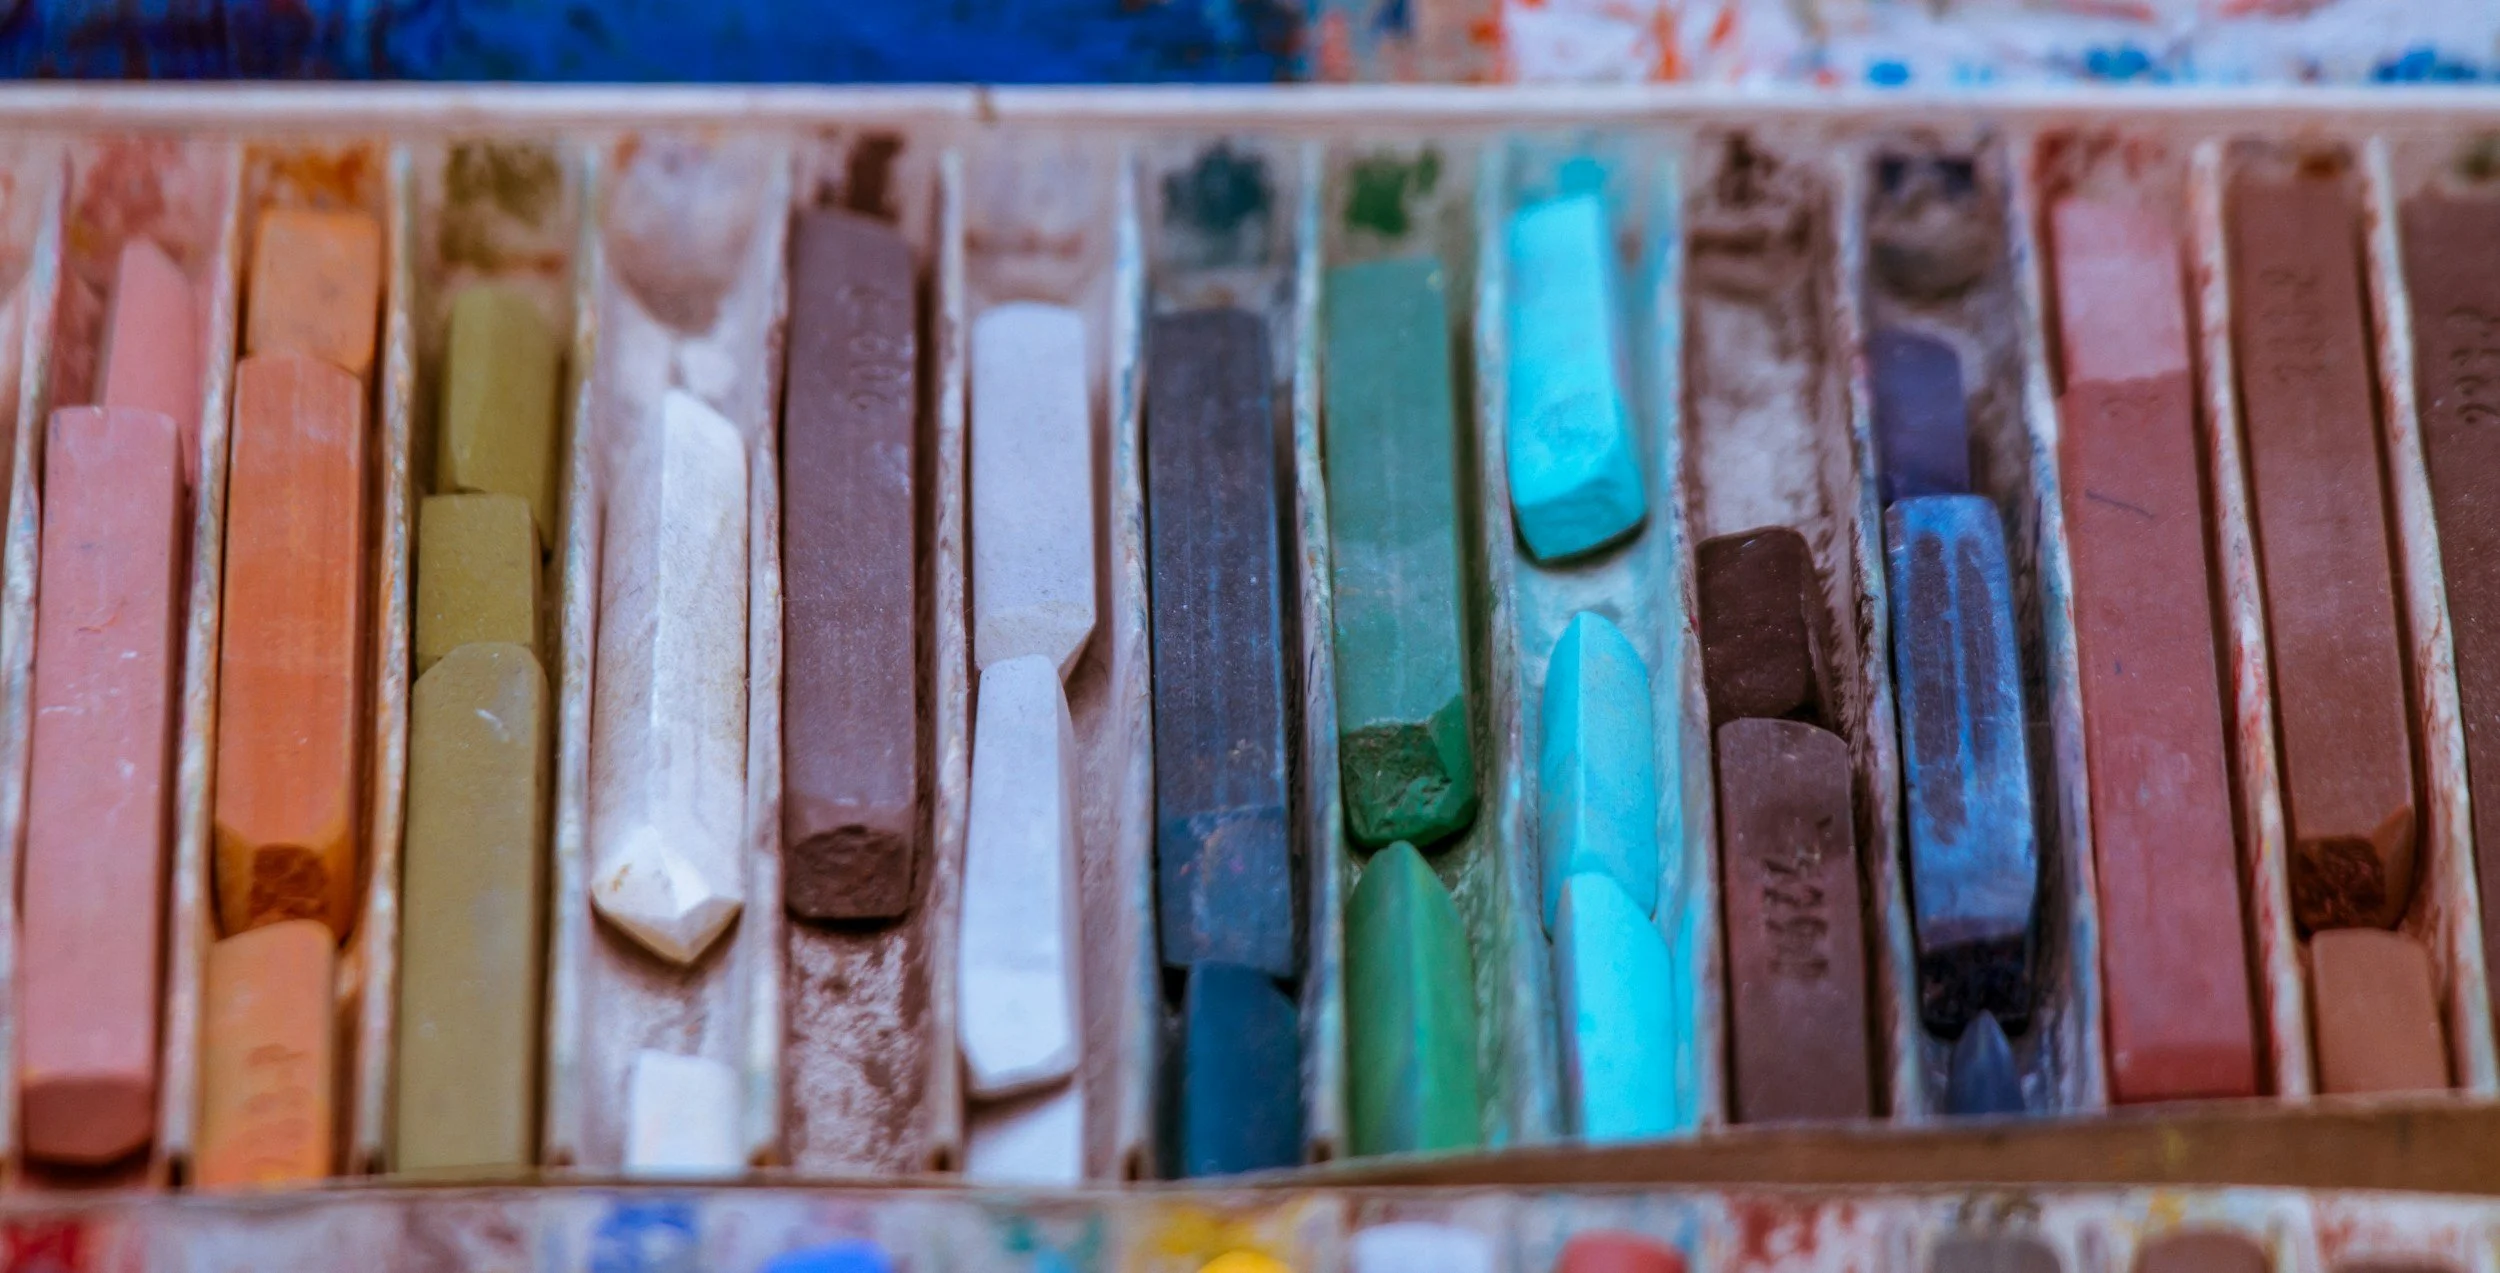
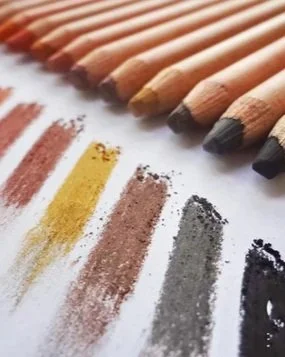
Pencils
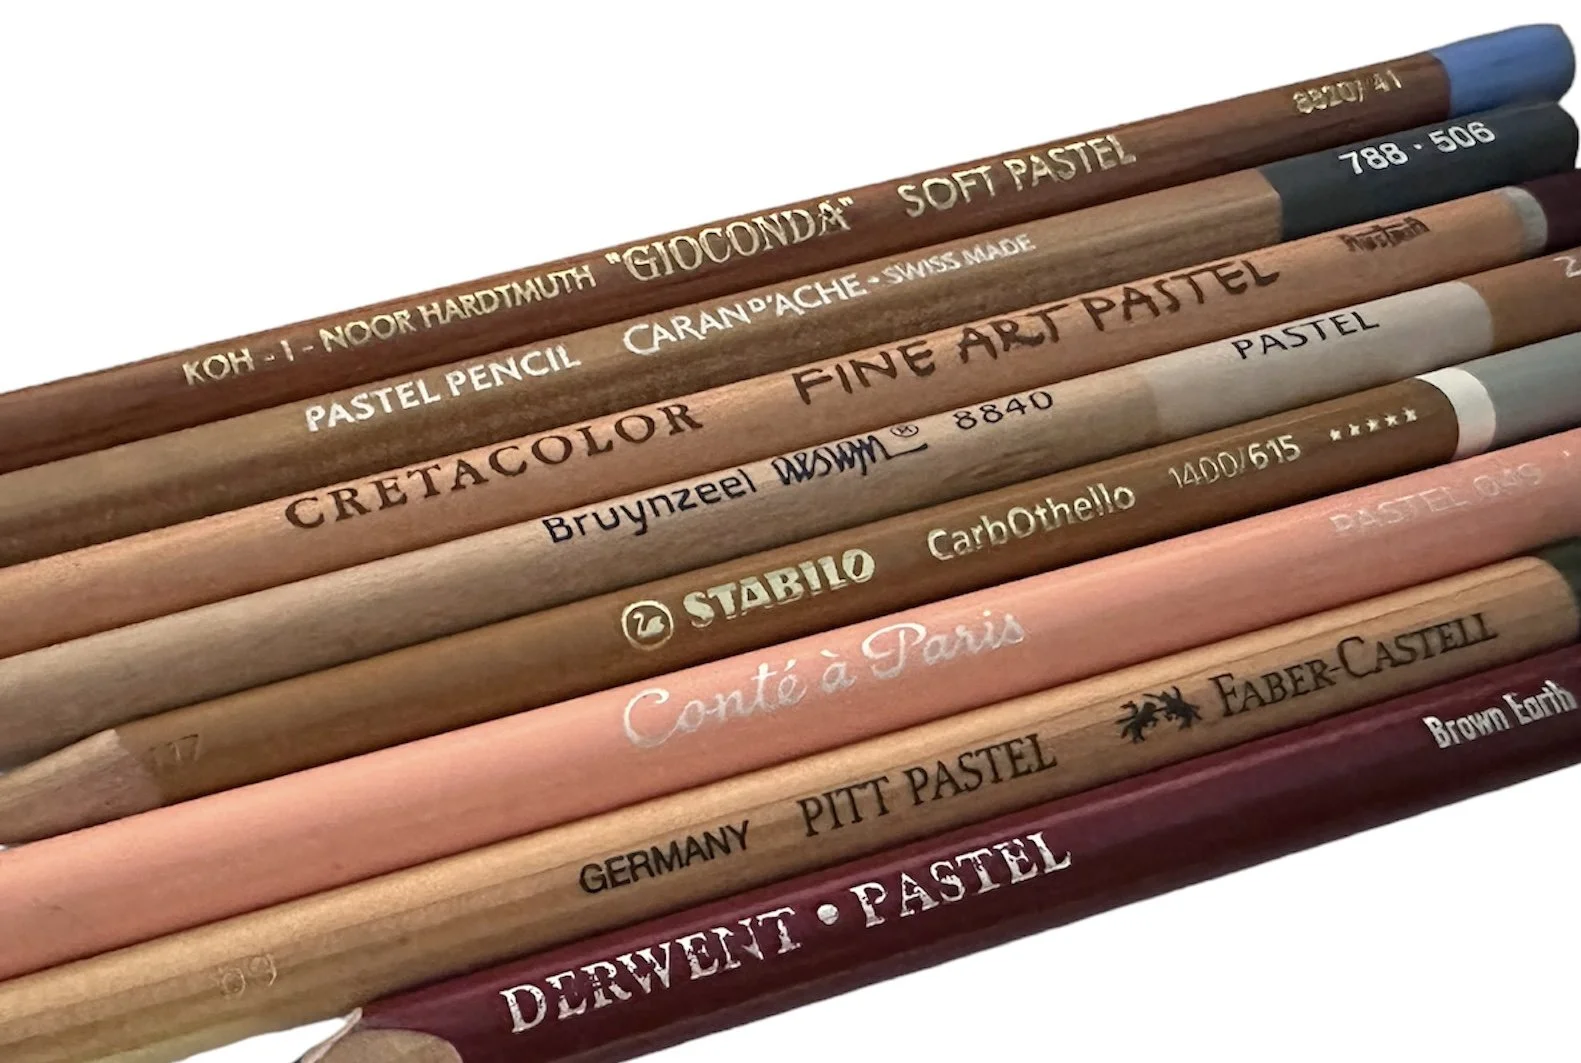
As an artist, I find joy in collecting pencils and adding them to my studio—their colours, textures and just how they look! Here’s a glimpse into my collection. The order of the list is my order of preference.
-
Cretacolor’s fine art pastels are versatile for me. The earthy tones work well for animal portraits. These are my personal favourites for animal portraiture as I can get the best details with them due to them having the “hardest” pastel led. I can get the pointiest and longest-holding tip sharpness with this pastel.
However, they can be a bit brittle and snap.
-
CarbOthello pastel pencils are both precise and blendable. I understand why they’re one of the most beloved pencil brands!
They’re good for blending and to me are the mid-point between Cretacolor & Pitt Pastels. They’re very comfortable to use.
The tip doesn’t hold its sharpness for very long though. -
Faber-Castell Pitt Pastel pencils offer lightfastness and a slightly gritty texture. They’re good for details.
They only slightly lack the buttery softness of some other pastels. Achieving fine fur details might be challenging for some but I haven’t had much issue.
The tip holds its sharpness less than Cretacolor, but more than Carbothello. -
Derwent Pastel pencils are the no-mess solution. They combine precision with blendability.
I like to use them to expand my color palette.
-
The Koh-I-Noor “Gioconda” pastel pencils have a velvety texture that works well for layering fur. The color range is decent, especially for natural tones like browns and grays.
However, they can be a bit hard, making it challenging to achieve soft transitions. Blending requires extra effort, and they tend to leave visible strokes.
-
Bruynzeel Design colored pencils are reliable workhorses. They’re great for initial sketches and underpainting. The price point is friendly and they help me to broaden my colour palette and fill in any colour ‘gaps’ I have.
They lack the intense pigmentation needed for capturing the nuances of animal fur, but they’re very soft and smooth to blend. Not the best choice for detailed work, but comfortable to use.
-
Conté à Paris pastels have a classic feel. Their earth tones are perfect for animal portraits. They’re also great for expressive strokes due to the thickness of the lead.
But beware—the dust! These pastels can create quite a mess. Also, they’re not as vibrant as some other brands but their blendablity makes up for all that.
-
Caran d’Ache has a great and broad colour range, and each pencil has a lot of pigment. This dense pigpentation is perfect for capturing the depth and vibrancy of animal eyes and fur. They blend seamlessly.
The price tag can be intimidating. Also, they’re quite soft, which means they wear down faster, especially when layering heavily.
They’re not my go-to for detail work and please beware!! Despite the price, oftentimes I get grit in these expensive pencils so I use them sparingly, or only when I really must to fill in colour gaps! I encourage anyone who hasn’t worked with these yet to use only very light pressure.
Pastel Chalks
&
Pans
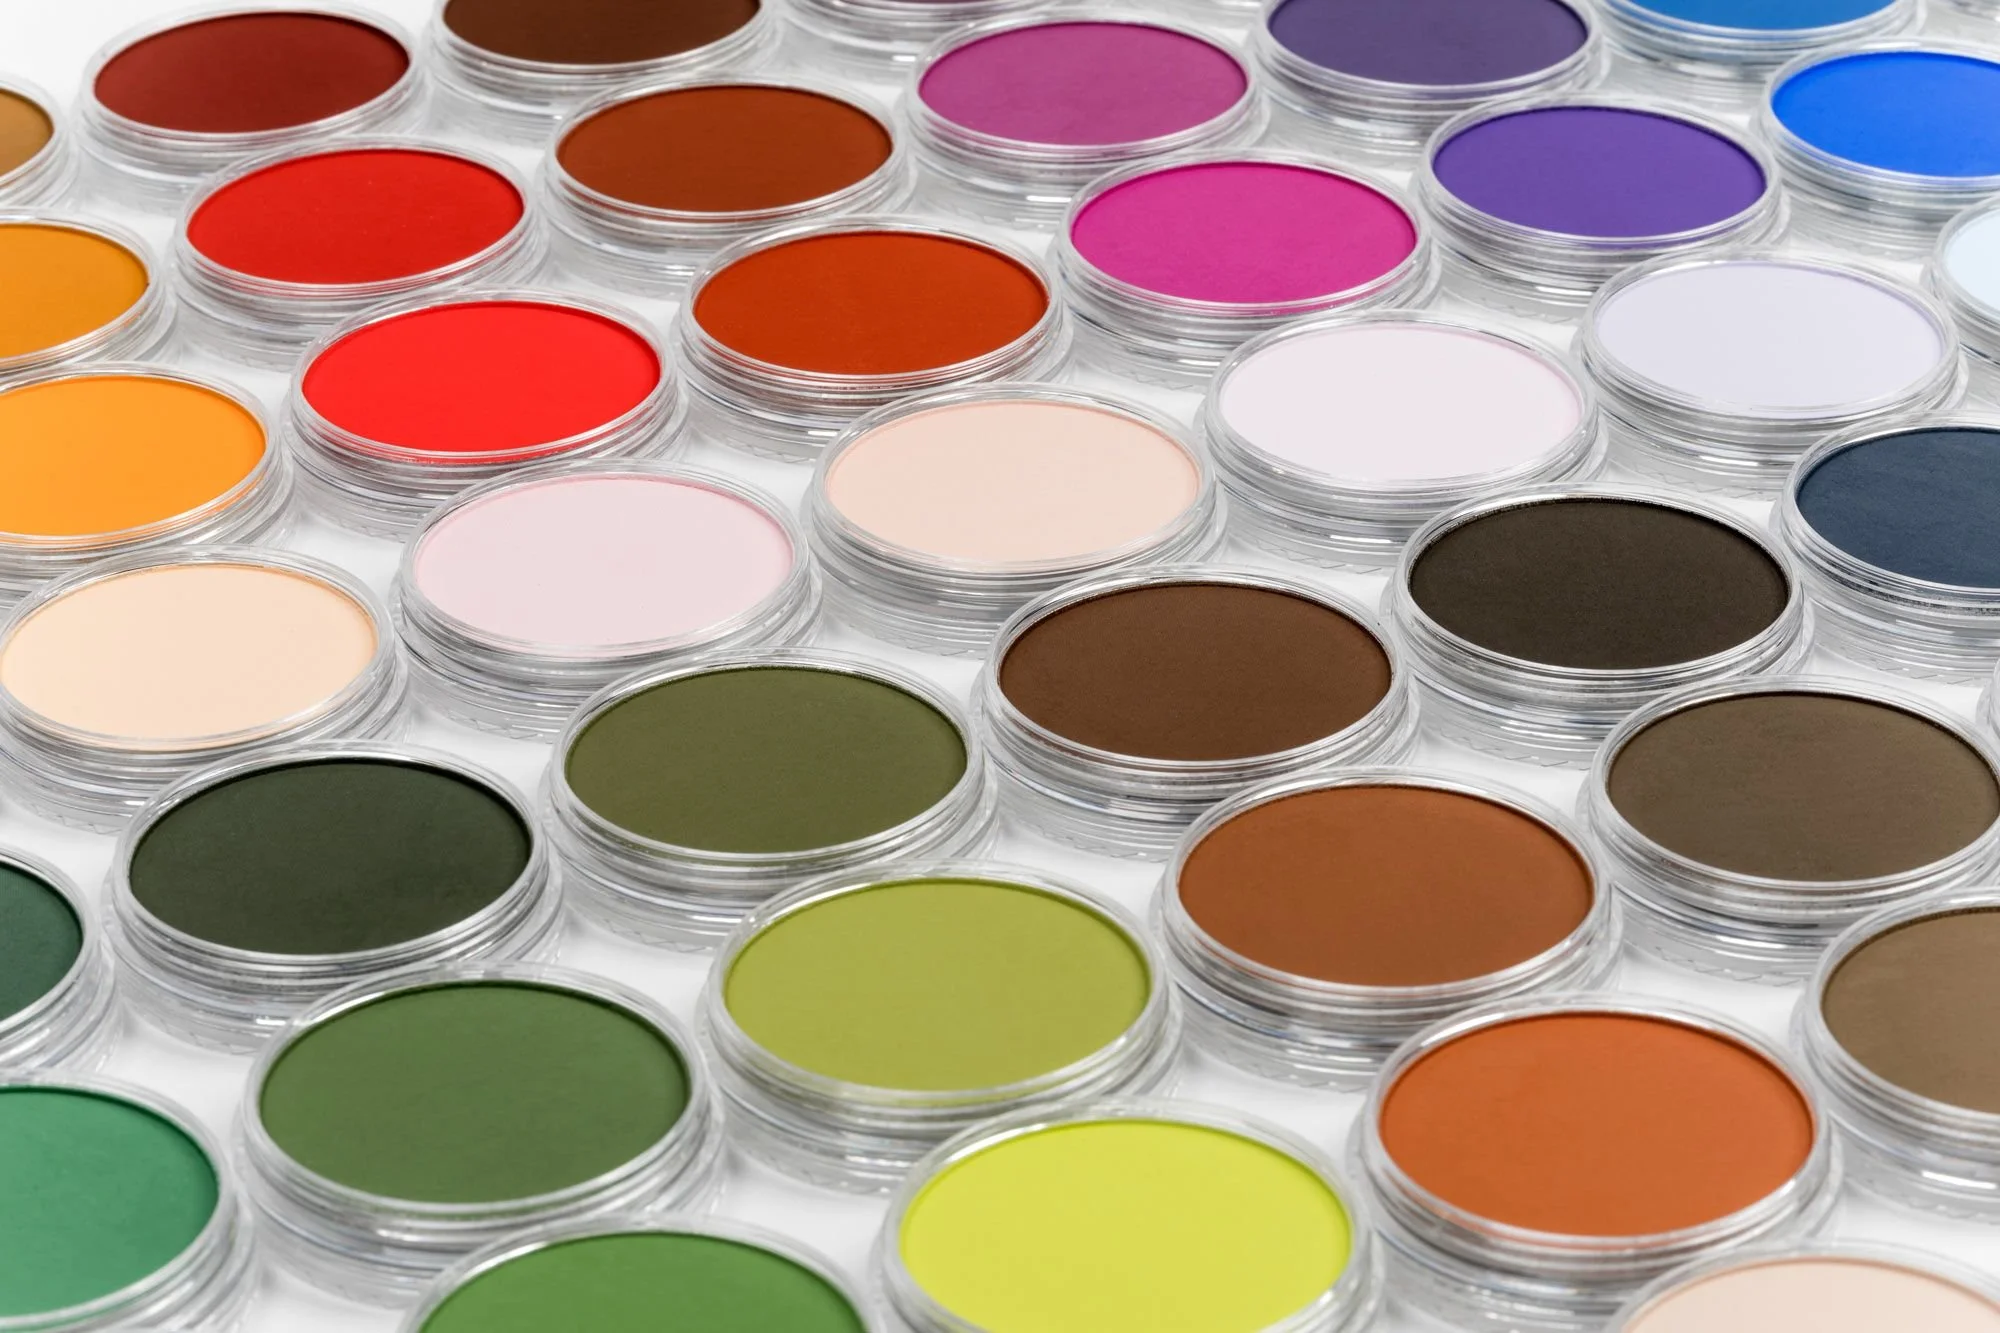
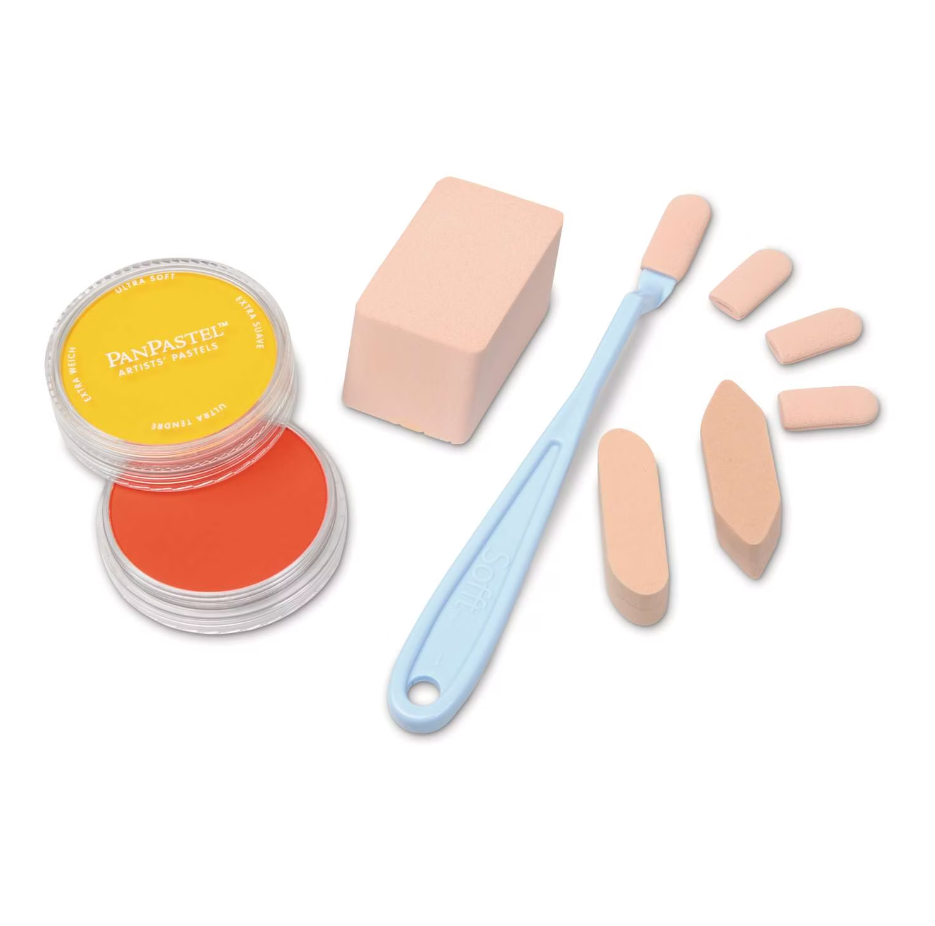
Pan pastels, chalks, and sticks form the foundation of my artwork. They allow me to lay down base colours, harmonise hues, and construct the initial colour story and palette. They help me to mentally map out structures. I prefer using Pan Pastels and Unisons for this foundational work. I use the remaining chalk and sticks to add general details and defining specific areas for shadows and highlights with some precision.
-
Pan Pastels are my foundation. They provide a soft, smooth base layer for my animal portraits, allowing me to establish initial colors and tones.
-
Unison Colour pastels are amazing for their vibrant colors andtheir creamy texture. I use them for backgrounds and the second step after the Pan Pastels, as their colour depth outshines the Pan Pastel, so I use them to layer on top the Pan Pastel, and not vis versa.
-
I use Rembrandt chalks when it comes to adding general details and fine(r) lines to my animal portraits.
Despite being chalks, their firm yet creamy consistency allows for relative precise application, enabling me to capture the general textures of fur, feathers, or scales with realative accuracy.
With a wide range of colors available, I can achieve subtle nuances and vibrant highlights to find mid-tone values between my Pan Pastel colors.
I use these and my other chalks / sticks as the layers on top of the Pan Pastel base layer.
-
I use Jaxel pastel sticks in the same way as the Rembrandts, but as to fill in the colour chart more.
-
I use Schminke pastel sticks in the same way as the Rembrandts & Jaxels.
-
These are incredibly soft, so I use them right after Pan Pastels, as if I add them any later, they can “crumble” off. They’re amazingly blendable.

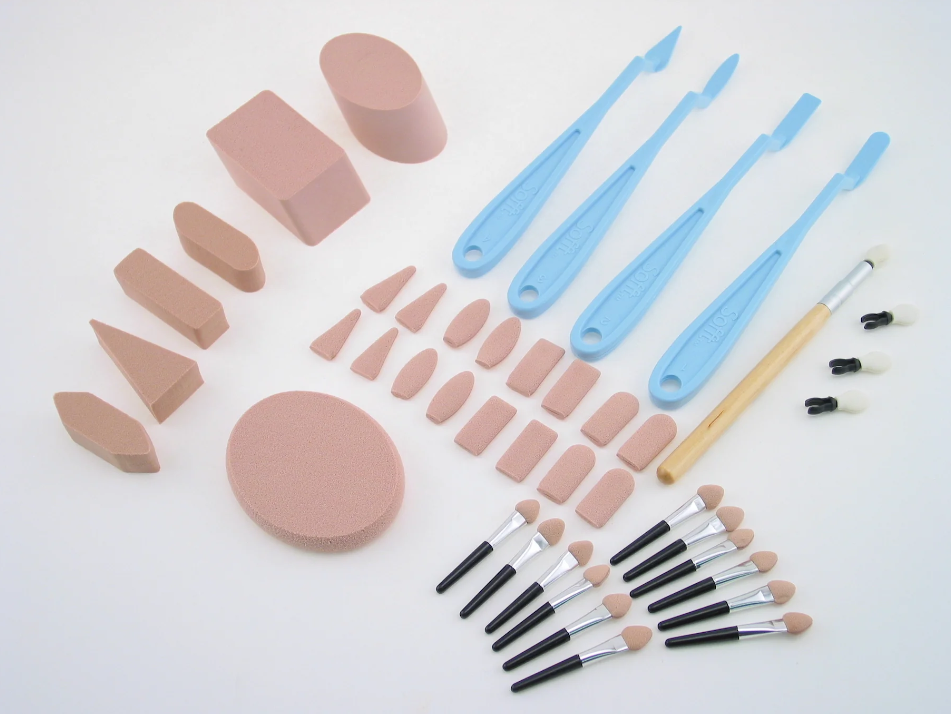
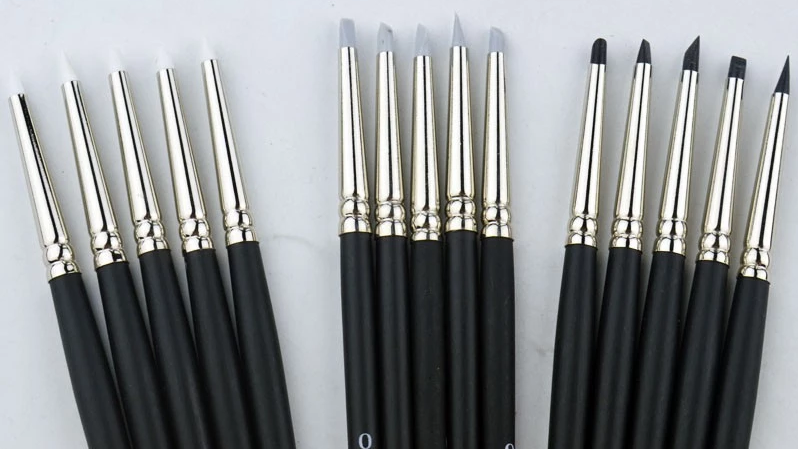
Blenders
-
I use these like palette knives for pan pastel placements. They’re also great for blending and definitely one of my main tools.
Here is a link to the brand & product(s). -
I use these again for product placement and background blending. Never for details.
Here is a link to the brand and product(s). -
These are for applying pan pastel more delicately.
Here is a link to the brand & product(s). -
I use these as they act like extremely precse blenders and also minimally as an eraser. I often create stroke textures for hairs and whiskers with these too.
Here’s a link to Jackson’s Art for this item.
Here’s another example. -
I use these in the same way I use the knives & covers, but to really press the colour in to allow for even more layers later on.
Here’s an example. -
Another way to apply pan pastels. One of my favourite tools.
An example is here. -
I use latex gloves whilst drawing, as I want to avoid any chance of smudges. This keeps me able to moisturise my hands throughout the day without having to worry about staining the paper.
I use these gloves for blending too. These may be my favourite ‘tool’ for blending backgrounds.
Fixatives
-
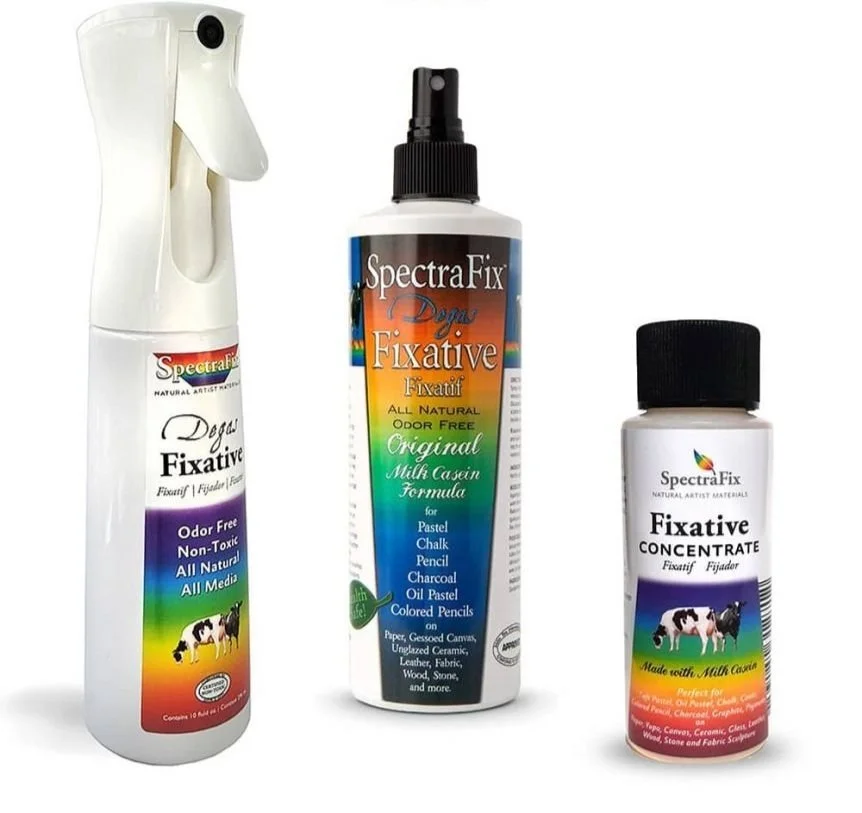
I use the SpectraFix in the Special Spray Can as my main fixative. This brand has been the fixative that changes the colour the least. I nonetheless use it sparingly as fixatives mostly fade details and blur fine lines. Surface pastels can also go on to just be blown away, which further reduces original
detail level.
It’s very important to get the Special Spray Can for the SpectraFix, as it causes the fluid to not land in droplets but more similarly to an aerosol mist. -
The tooth in each colour of the Pastelmat Ampersad is different, and depending on the colour, I use a base spray of Aerosol to improve adherence more.
Set up
-
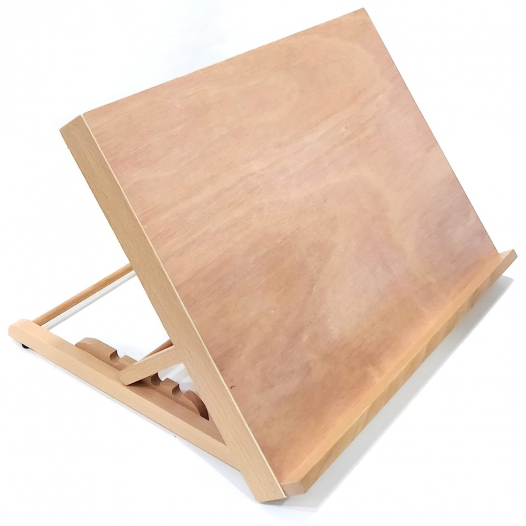
I use the Cowling & Wilcox Lexington A2 Workstation.
The size of this workstation is one of the limiting factors for sizes (until I upgrade). It works well for me though for now! -
I use both wide masking tape and wide painter's tape to secure the canvas to the easel or workstation. These tapes prevent any residue and are gentle on the surface. They hold it securely on the easel.
-
I use Clairefontaine’s Crystal Glassine paper for packaging, layering WIPs, and also to protect my gloved hand while drawing to avoid smears.
-
I use the Hag Capisco 8126. This helps me a lot as I have lower back pain due to lumbar lordosis and also scoliosis in my cervical vertebrae.
-
I made my desk myself to fit in my room, with Ikea adjutable height legs and a desk in L-shape.
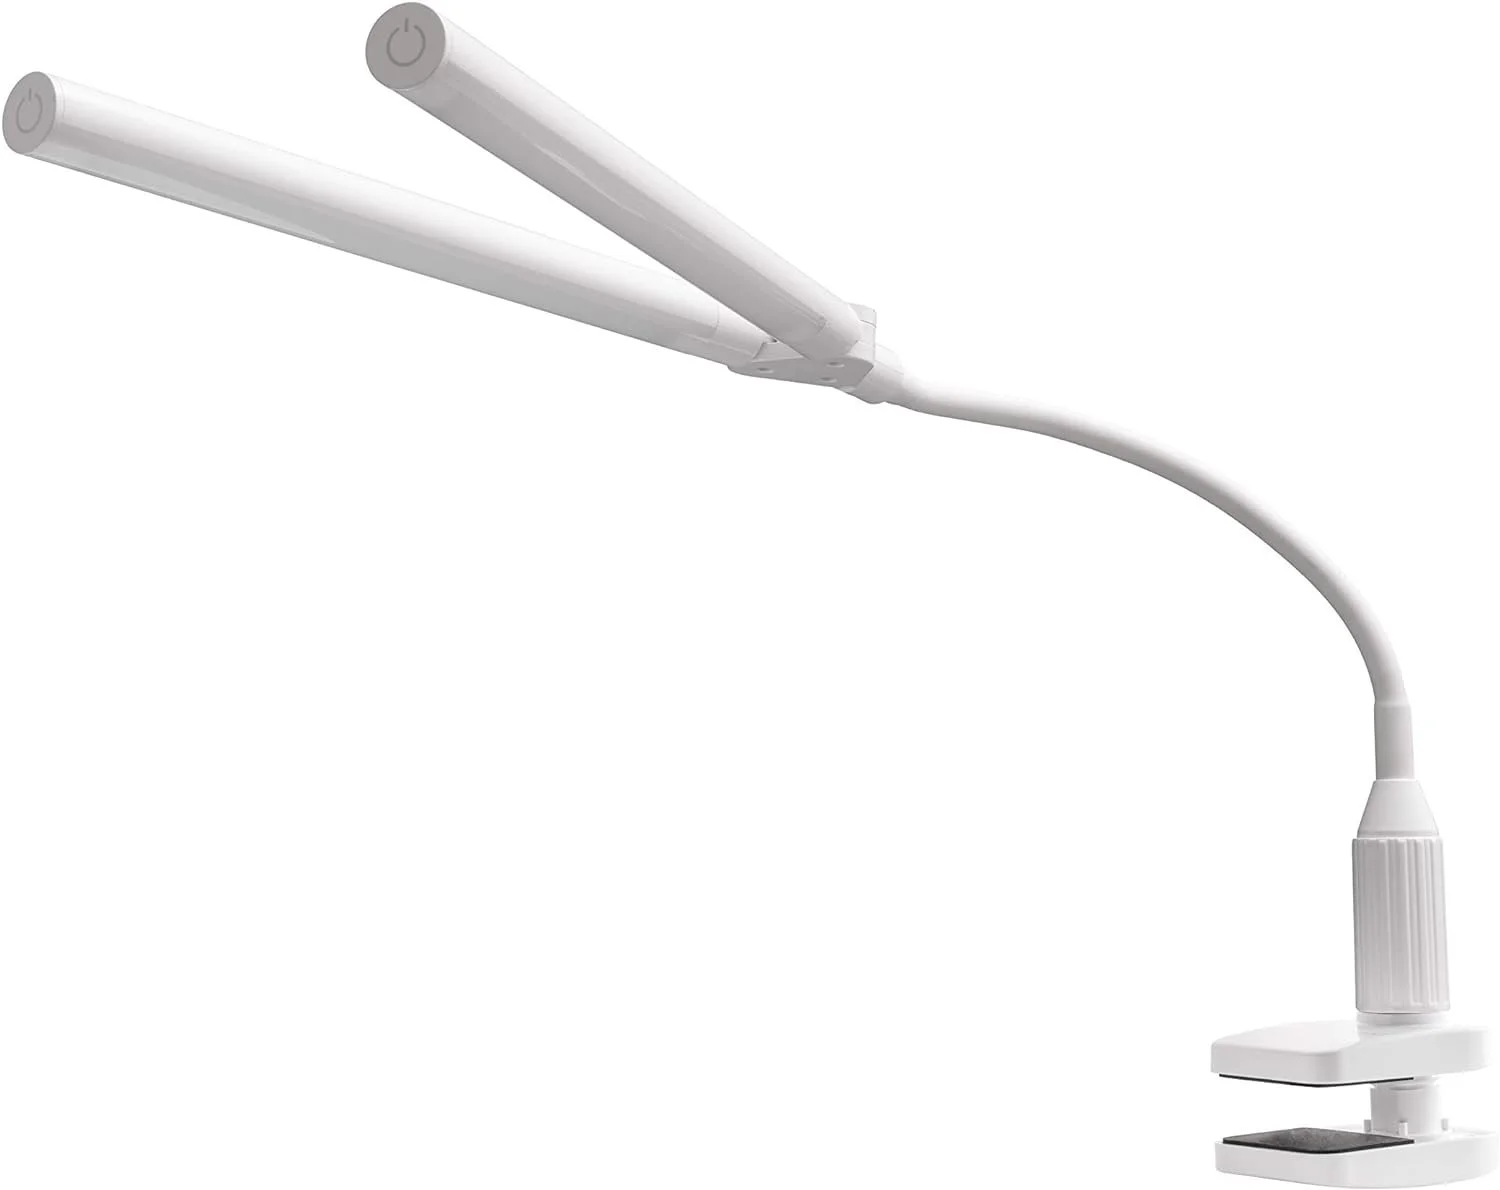
Lighting
-
6000 lux, closest to warmth of daylight, any warmer and I would use too many blues and any colder and I use too many oranges or yellows to compensate. I have two of these lamps. I can draw at any time of day with these!
Here’s a link to one.
Pencil Sharpeners
-
I use one of these for pencils that are not too soft, e.g. perfect for cretacolour, terrible for caran d’ache!
Here’s a link to the brand & product. -
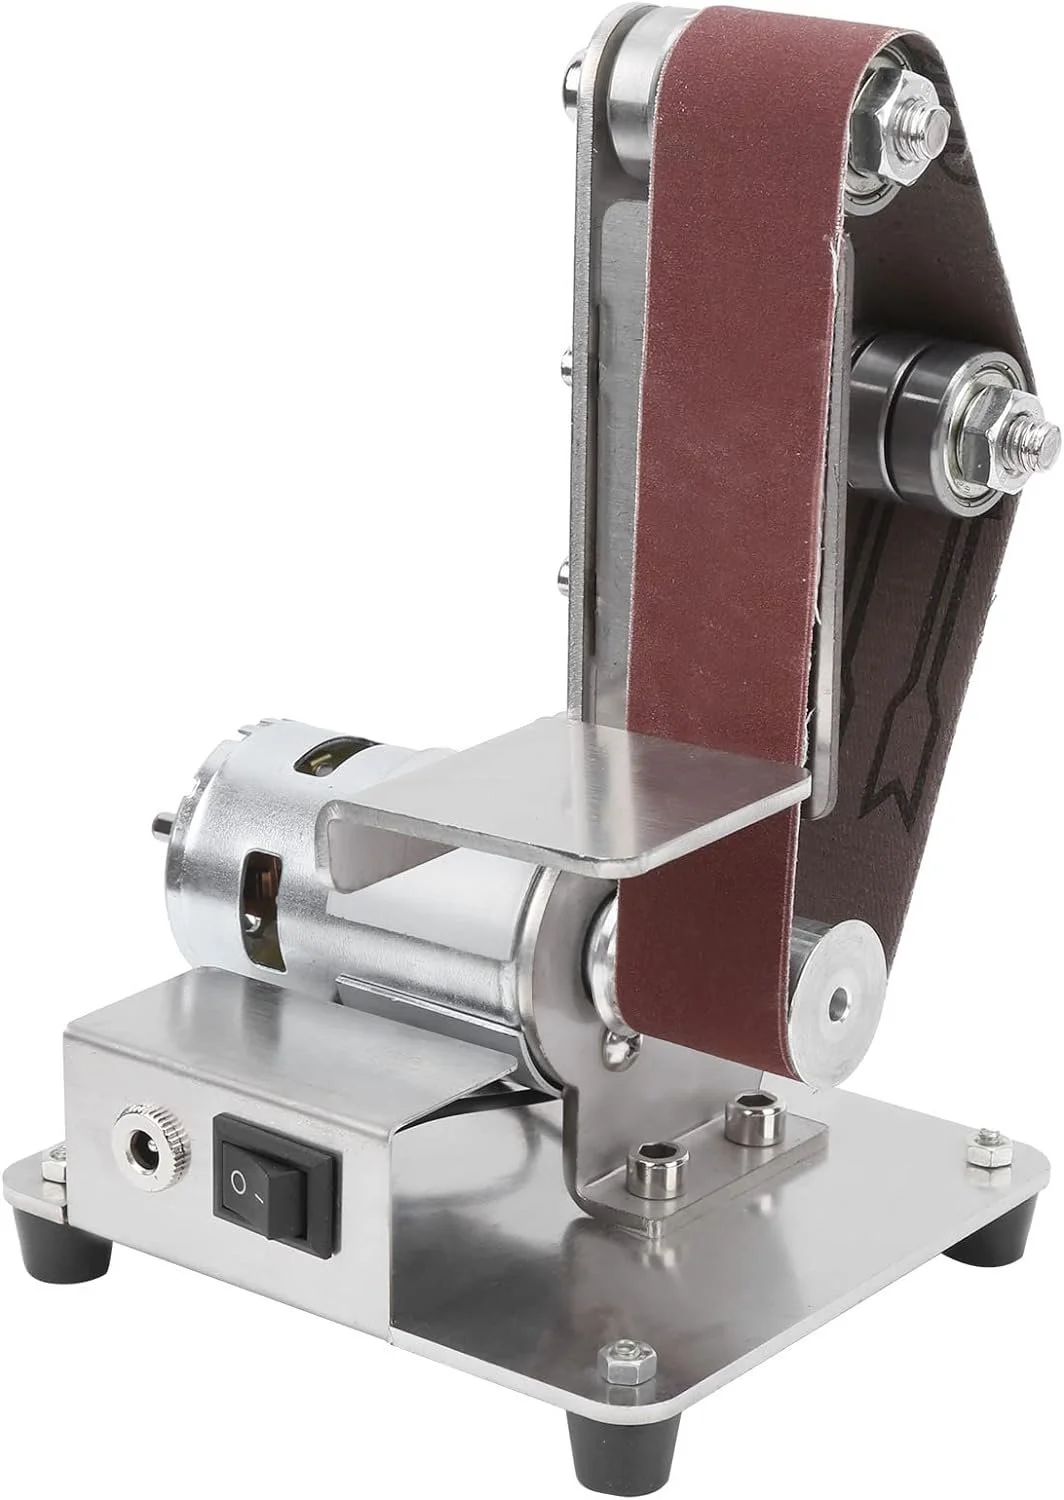
This sharpening method comes from Shaymus Art. The results are great but it is inconvienient.
It’s important to use pencil extenders with shorter pencils. Belt sanders with vacuum attachment sections are better.
https://www.amazon.de/-/en/VISLONE-Sharpener-Adjustable-Polisher-Polishing/dp/B089WFGYLD/ref=sr_1_57?dib=eyJ2IjoiMSJ9.Nh_ZFPDtx1vUbu08loyBaA1ATYtNJ0A5n0sDjZbZApzXkTQmkayx5H4ru6wXs_HdLSj-bbL34ki7DUl52dVT6zhPeIZEF7ahSHcW7UXuBSVN--3GdvLQTceO47fqlmyr-uBoJPlPwLTATZRpYZMMNBZyZ-Zu27I6AThvK5TzUybgx8lZFViYhA1X6wvo7KU0.4jT3F_UXgZmvq2DD7lV4m_ZRTRkXDoCm7gKhVG2cF4s&dib_tag=se&keywords=belt+sanding+machine&qid=1715523989&s=diy&sr=1-57&xpid=3-_3hxjrzeET9 -
Made of brass. I use this for quick sharpening.
Here’s a link to the product. -
Of even quicker, I use a stanley knife, I just don’t love the mess and the risks of cracking off tips.
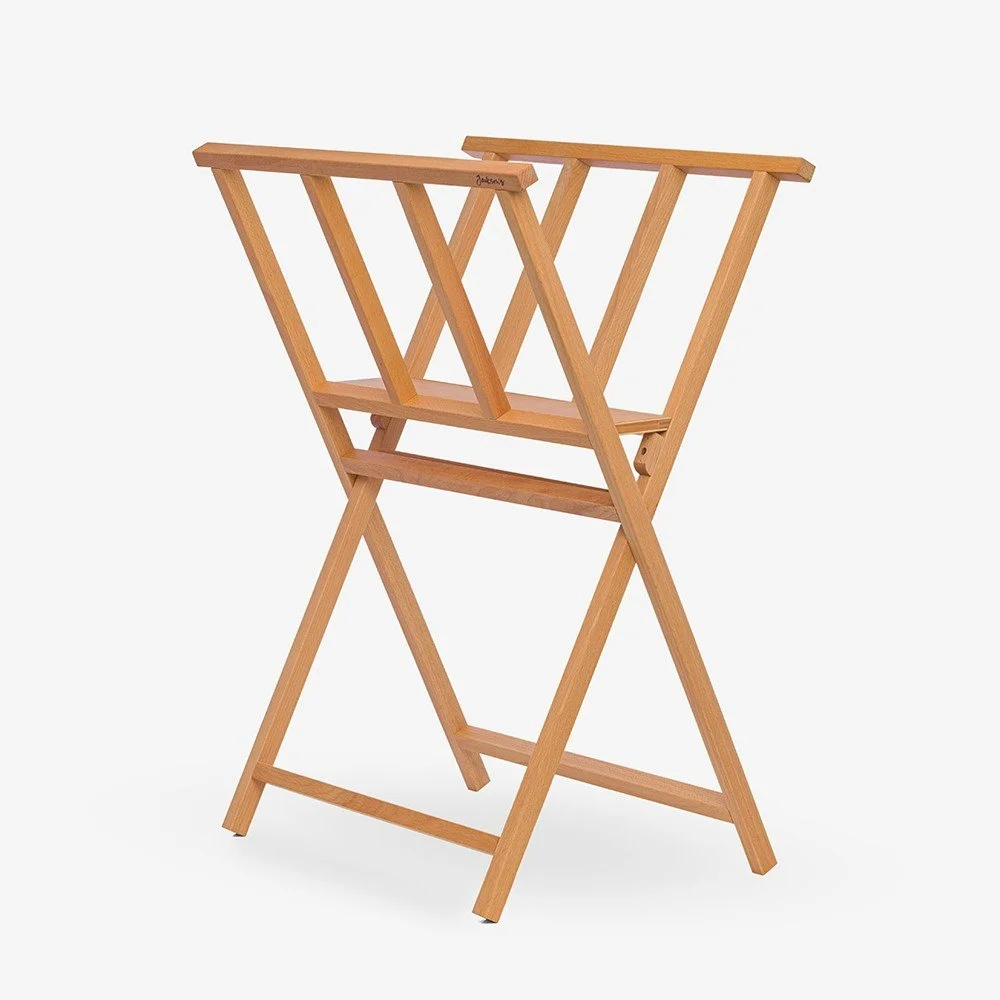
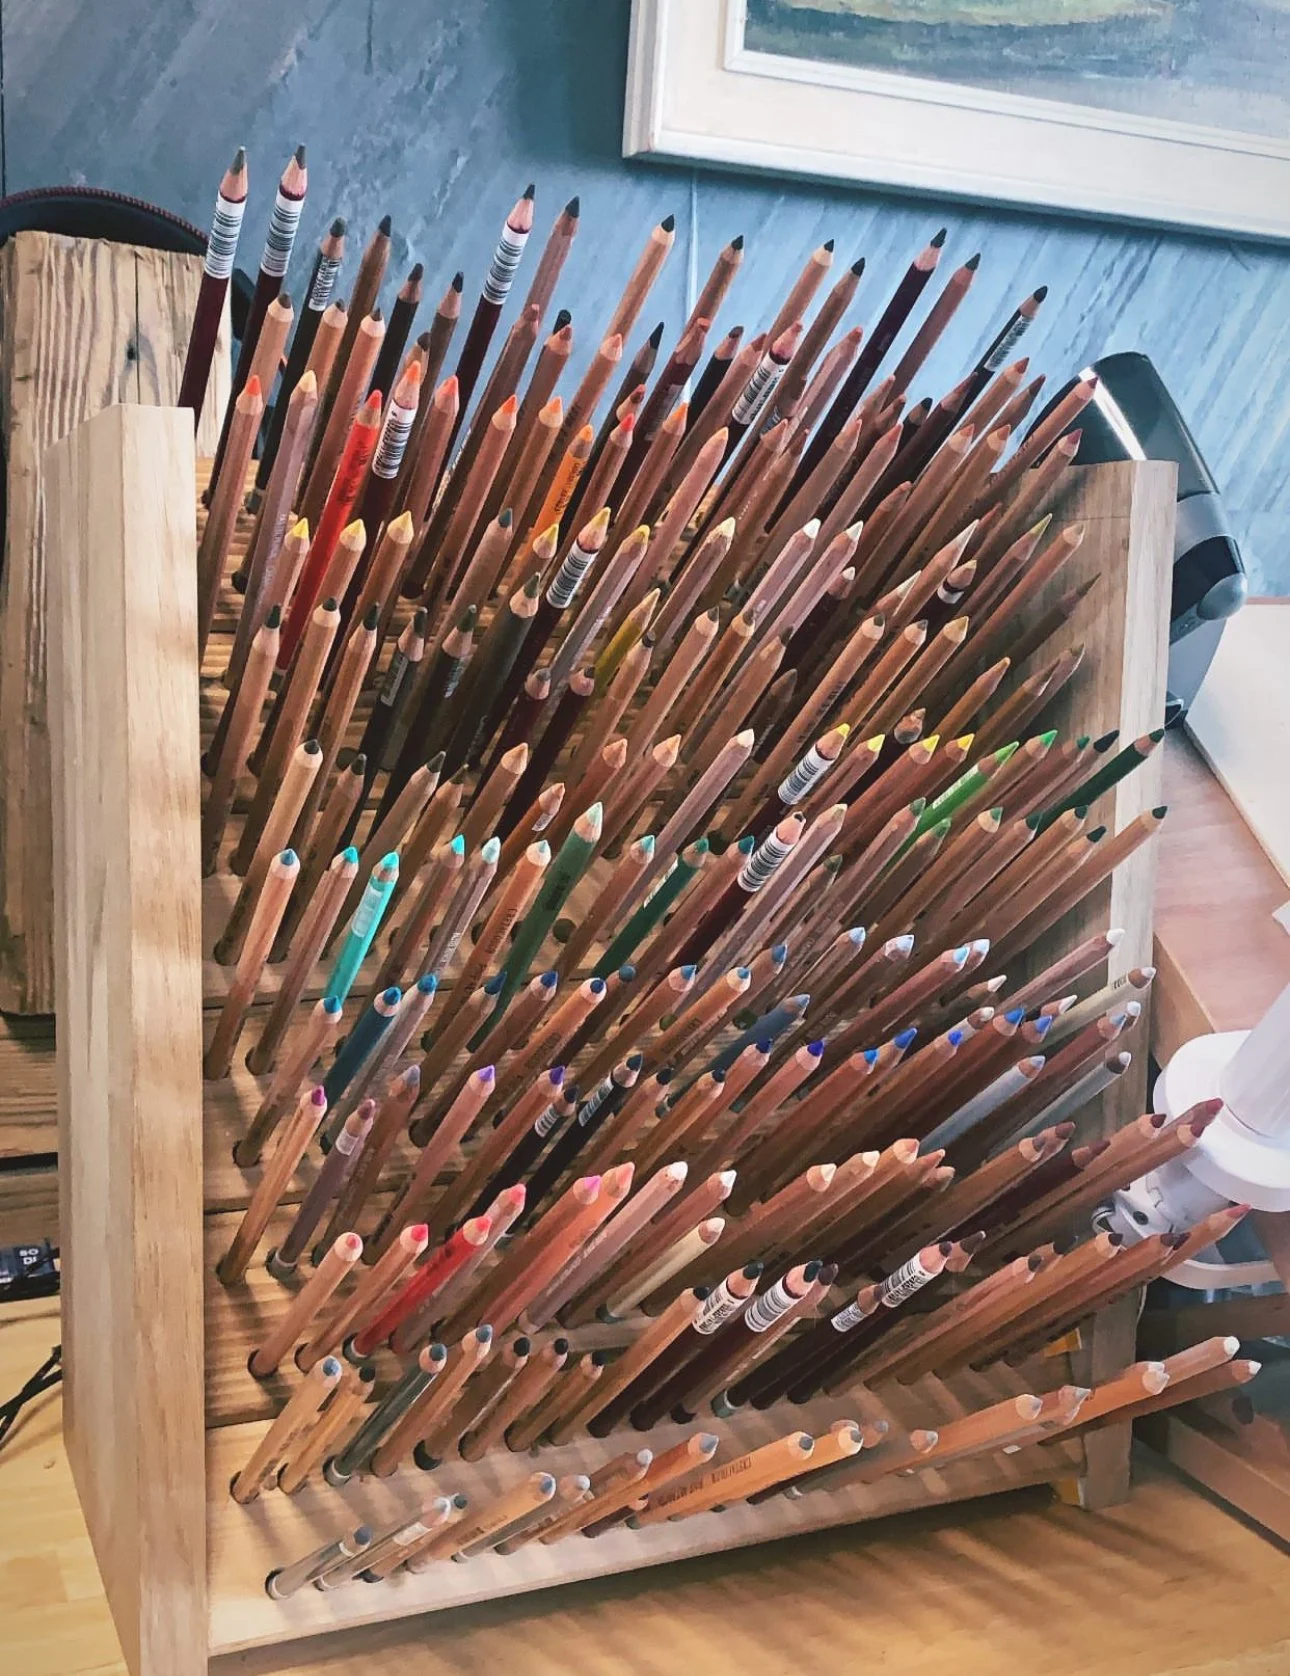
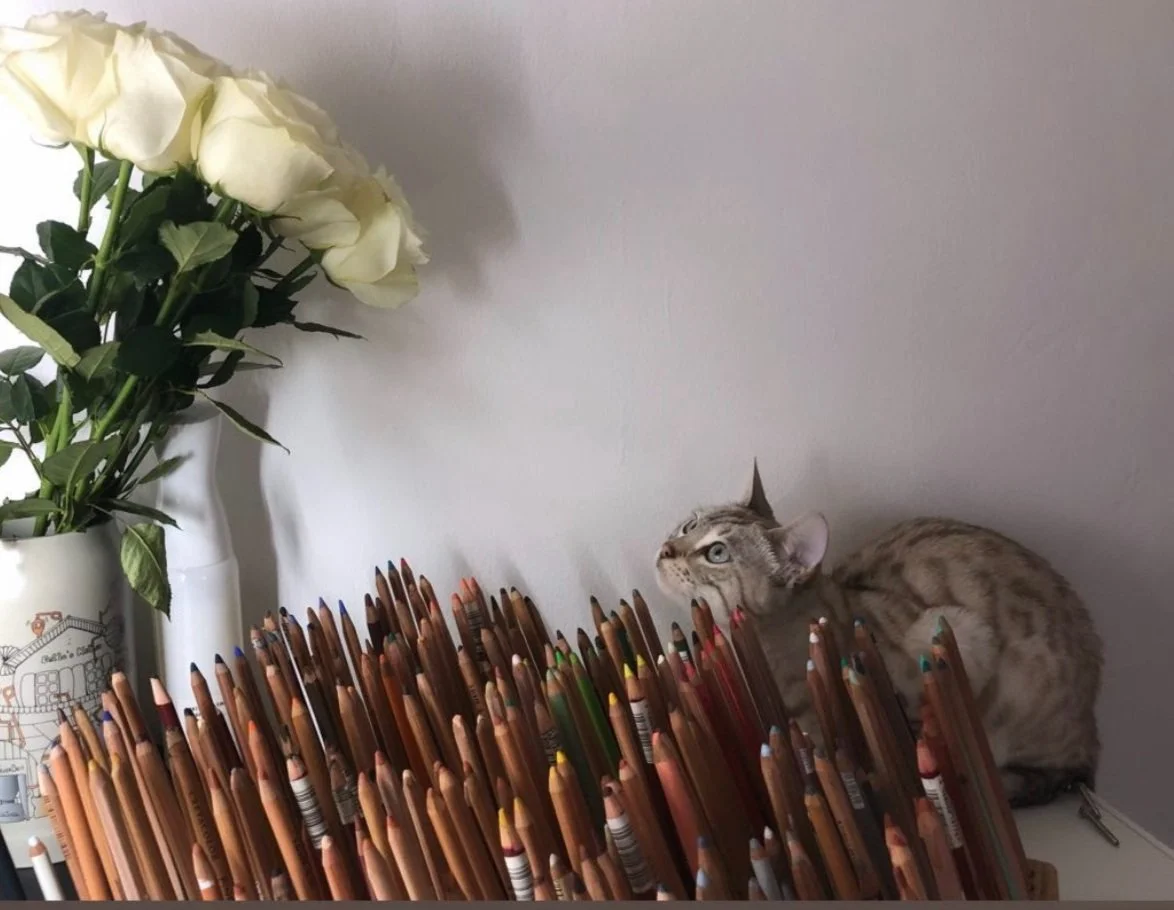
Storage
-
I made the pencil stand that you can see on the right by hand at my home. I still need to think of better ways to store my pencils, as what I once built is no where near enough now!
-
I use Jackson’s Print Rackk to store my art pieces. I separate with boards, so that now bowing can take place.
Do you appreciate the information on the website or want to help give me an energy boost for drawing or studying? Below is a link for the chance give me a small donation if you’d like to support me with energy!
Tools
-
Description text goes here
-
I use Pan Pastel Sofft Tools, i.e. the knives, and covers, their art sponges and their applicators.
Paper blending stumps
Clay Moulders -
Description text goes here
-
Item description
-
3000 lux
-
Item description
-
Item description
-
Item description
-
Item description
-
Item description
Follow our journey.


Blenders
-
What should we know about the services you provide? Better descriptions result in more sales.
-
What should we know about the services you provide? Better descriptions result in more sales.
-
Item description
-
I use these as they act likeextremely precse blenders and also minimally as an raser
-
Item description
-
Item description

Fixatives
-
What should we know about the services you provide? Better descriptions result in more sales.
-
What should we know about the services you provide? Better descriptions result in more sales.

Pencil Sharpeners
-
What should we know about the services you provide? Better descriptions result in more sales.
-
What should we know about the services you provide? Better descriptions result in more sales.